Shopify sellers can lose margin before an order reaches the checkout. Freight, duty, tax, and broker fees can turn a cheap supplier quote into an expensive SKU.
To calculate landed cost, add every cost needed to get one sellable unit into stock, then divide the total by the units received. You can do this in a spreadsheet or use SupplyAutomate to keep the numbers tied to your orders and documents.
Step 1: Identify Every Component of Your Shopify Landed Cost
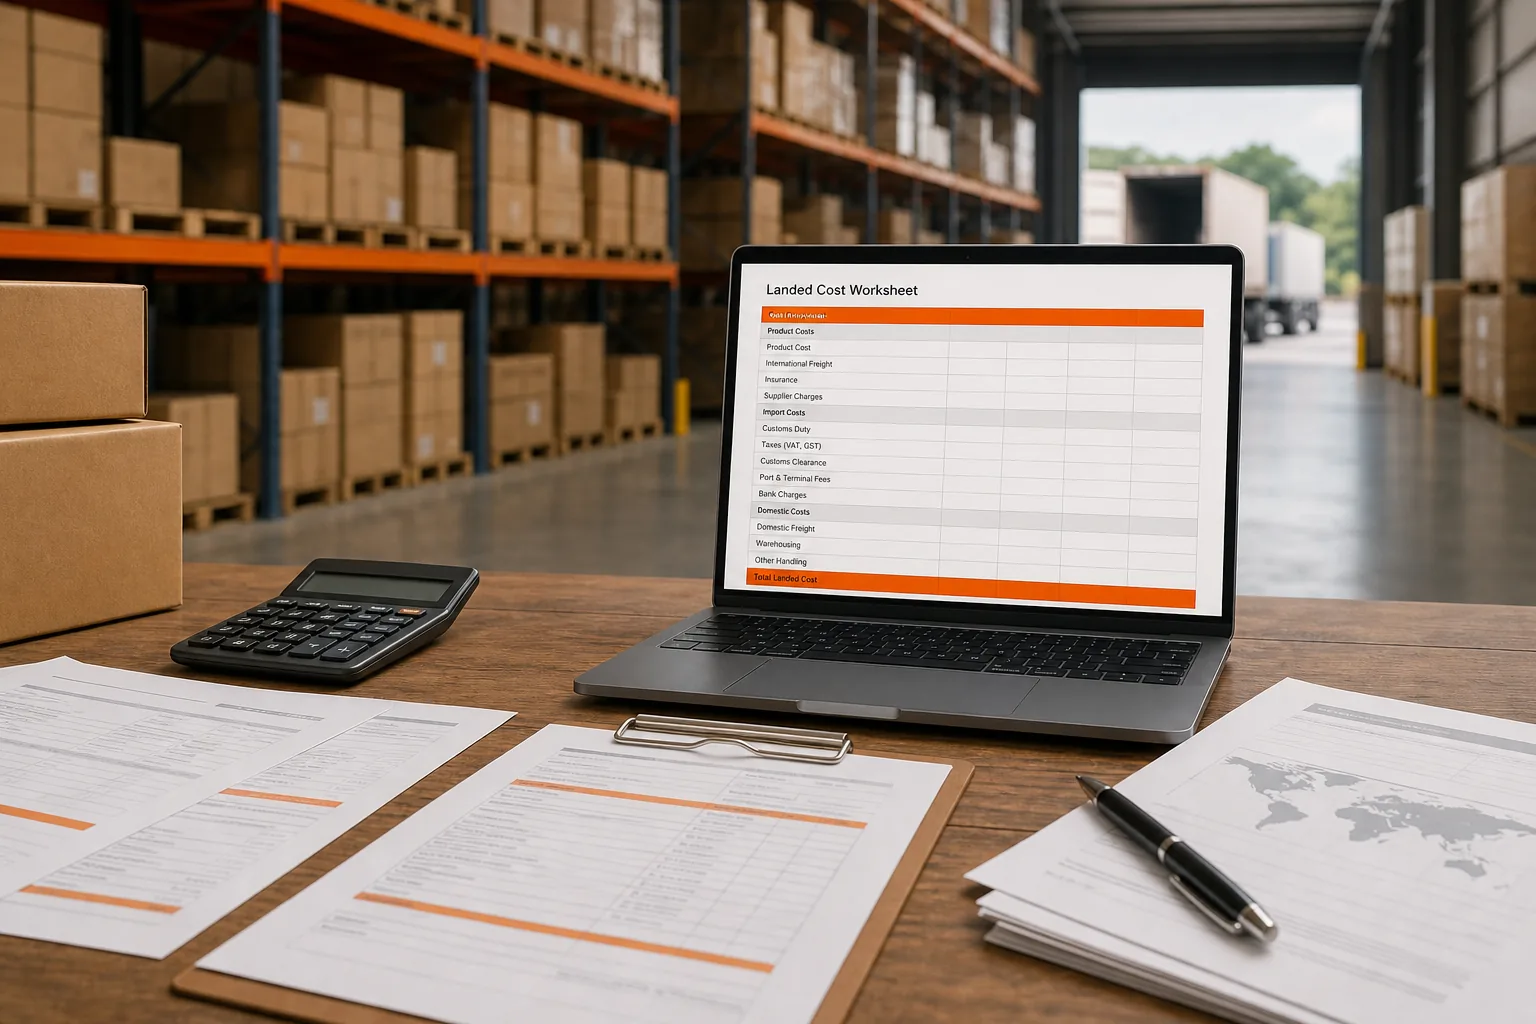
The first step in learning how to calculate Shopify landed cost is to list every charge tied to the shipment. Start with the supplier invoice, then work outward until the goods are ready to sell. If the term itself is new, start with what landed cost is and why it matters, then review how to calculate landed cost for imported products for a detailed breakdown of each import charge.
Use these ten cost fields for each shipment:
- Product cost: The supplier price for each SKU or variant.
- Freight: Ocean, air, rail, or parcel transport to the destination.
- Shipping cost: Any separate transport charge not already included in freight.
- Duties: Customs duty based on customs value, product classification, and origin.
- Taxes: Import VAT, sales tax, or other taxes that your business must pay.
- Brokerage fees: Charges for customs entry and clearance.
- Insurance: Cargo cover paid for the shipment.
- Port or terminal fees: Charges for moving goods through the port.
- Handling and drayage: Local movement, unloading, and warehouse handling.
- Other allocable costs: Inspection, packaging changes, storage, or similar shipment costs.
Check the Incoterm on the purchase order before adding anything. EXW, FOB, and CIF place different costs on the buyer. If you ignore that detail, you may count freight twice or leave it out.
The standard definition of landed cost treats it as the full cost of getting goods to their destination. That is the right frame for Shopify pricing too. Your supplier price is only one part of the cost.
Duty deserves extra care. A product's classification can change the rate. Research reviewed for this topic found an example where reclassifying a SKU reduced duty from 12% to 3.7%, without changing the product price. Confirm the classification and origin before you approve a large PO.
For a mixed shipment, do not split every shared charge by unit unless the products are nearly identical. Use volume when container space drives the bill. Use weight when heavy goods drive the freight. Use customs value when a fee follows the value of the cargo.
By now you should have one row per SKU, the shipment quantity, and a place for each cost component.
Step 2: Calculate Landed Cost Manually With a Spreadsheet
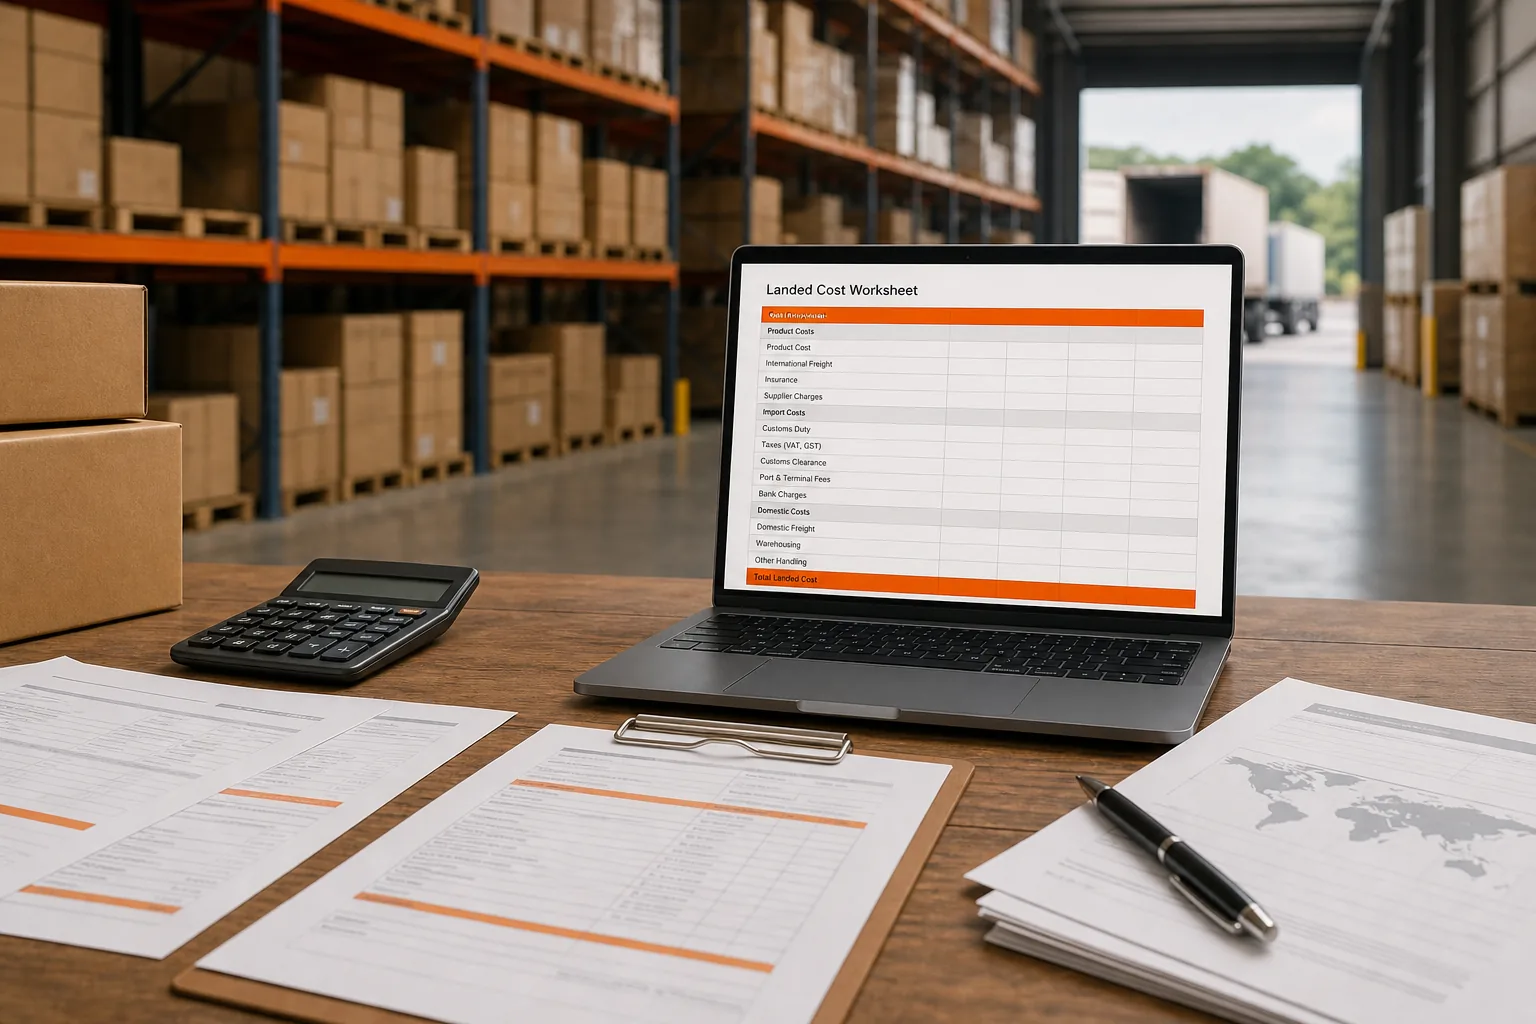
A spreadsheet gives you a clear answer when you need to calculate Shopify landed cost before an app is in place. Build the model at the SKU level, not only at the shipment level.
Use this formula:
Total landed cost = product cost + freight + duties + taxes + brokerage + insurance + port fees + handling + other allocable costs
Then calculate:
Landed cost per unit = total landed cost ÷ sellable units received
Suppose a shipment brings in 500 sellable units. The supplier invoice is $10,000, freight is $1,800, insurance is $60, duty and import fees come to $1,240, and final delivery is $400. That totals $13,500, so landed cost is $27.00 per unit against a supplier price of $20.00.
That example leaves out payment fees because landed cost usually tracks inventory cost. For selling decisions, add those fees to a second margin view. This keeps product cost separate from the cost of taking an order.
For instance, an online payment fee may include a percentage of the full order plus a fixed amount. If you charge the customer for shipping, the payment fee can apply to that shipping amount too. A third-party gateway may also add a Shopify transaction fee on top of its own fee. Check your current plan and gateway terms before placing the rate in your sheet.
Use the SupplyAutomate landed cost calculator to test the cost stack before you build a larger model. It helps you see freight, duties, taxes, insurance, currency conversion, and handling in one result.
Currency conversion needs its own cell. Convert supplier invoices and freight bills into the currency used for your Shopify margin report. Record the exchange rate date. A small currency move can change the result when the shipment value is high.
For shared costs, add an allocation column. A freight bill of $6,000 might be allocated by cubic meter. A brokerage bill of $450 against $22,500 of cargo equals $0.02 per dollar, or 2% of cargo value. That fee is easy to miss if you only copy the supplier invoice into Shopify.
Keep estimated and actual columns. Use estimates before the PO. Replace them with customs receipts and final freight bills after receipt. This two-stage process shows where your model missed and gives the next shipment a better starting point.
By now you should have a repeatable workbook with formulas, source documents, and a margin view that includes selling fees.
Step 3: Choose and Install a Shopify Landed Cost App
When manual work starts to slow your Shopify operation, an app can calculate or display costs at checkout. Choose based on the job you need done. Some tools focus on customer-facing tax and duty estimates. Others focus on internal SKU margin control. The comparison of landed cost spreadsheets versus software sets out the point where the workbook stops being worth maintaining.
| Use case | What to check | Best fit | Watch for |
|---|---|---|---|
| Show import charges at checkout | Country rules, duty estimates, cart display, theme support | Checkout duty and tax app | Rates may be estimates |
| Prepay duties for the buyer | DDP support, carrier workflow, tax handling | International checkout app | Confirm who pays the customs bill |
| Track margin by SKU | Supplier cost, freight, duty, origin, margin alerts | Internal landed-cost dashboard | May not display costs to shoppers |
| Manage documents and POs | Invoice matching, shipment records, cost updates | SupplyAutomate | Set permissions before syncing data |
SupplyAutomate is built for Shopify sellers who need the cost record behind the sale. We connect supplier documents, purchase orders, shipments, and product costs so you can review what a SKU really costs after freight and import charges. For a closer look at the Shopify workflow, see this Shopify supply chain app review.
For Shopify, Amazon FBA, and WooCommerce retailers comparing broader inventory workflows, ecommerce inventory management software should also be evaluated for purchase orders, supplier tracking, and SKU-level landed costs.
For a checkout-facing tool, confirm that it supports your selling countries and theme. For an internal tool, confirm that it can store costs by SKU or variant. Look for a margin workflow that includes product syncing, cost inputs, scenario modeling, and alerts.
Install the app from Shopify Admin, review the requested permissions, and start with a small group of SKUs. Importing the whole catalog at once makes errors harder to spot. Test one product with a known supplier invoice and compare the result with your spreadsheet.
Do not judge an app by its widget alone. Ask three questions:
- Does it use the right origin and product classification?
- Can you change freight or duty assumptions before the next order?
- Can you trace the number back to an invoice or customs document?
SupplyAutomate is a good fit when your problem is more than a checkout label. It gives your team one place to ask, "What did this order really cost?"
Step 4: Configure DDP, DDU, and the Checkout Cost Display
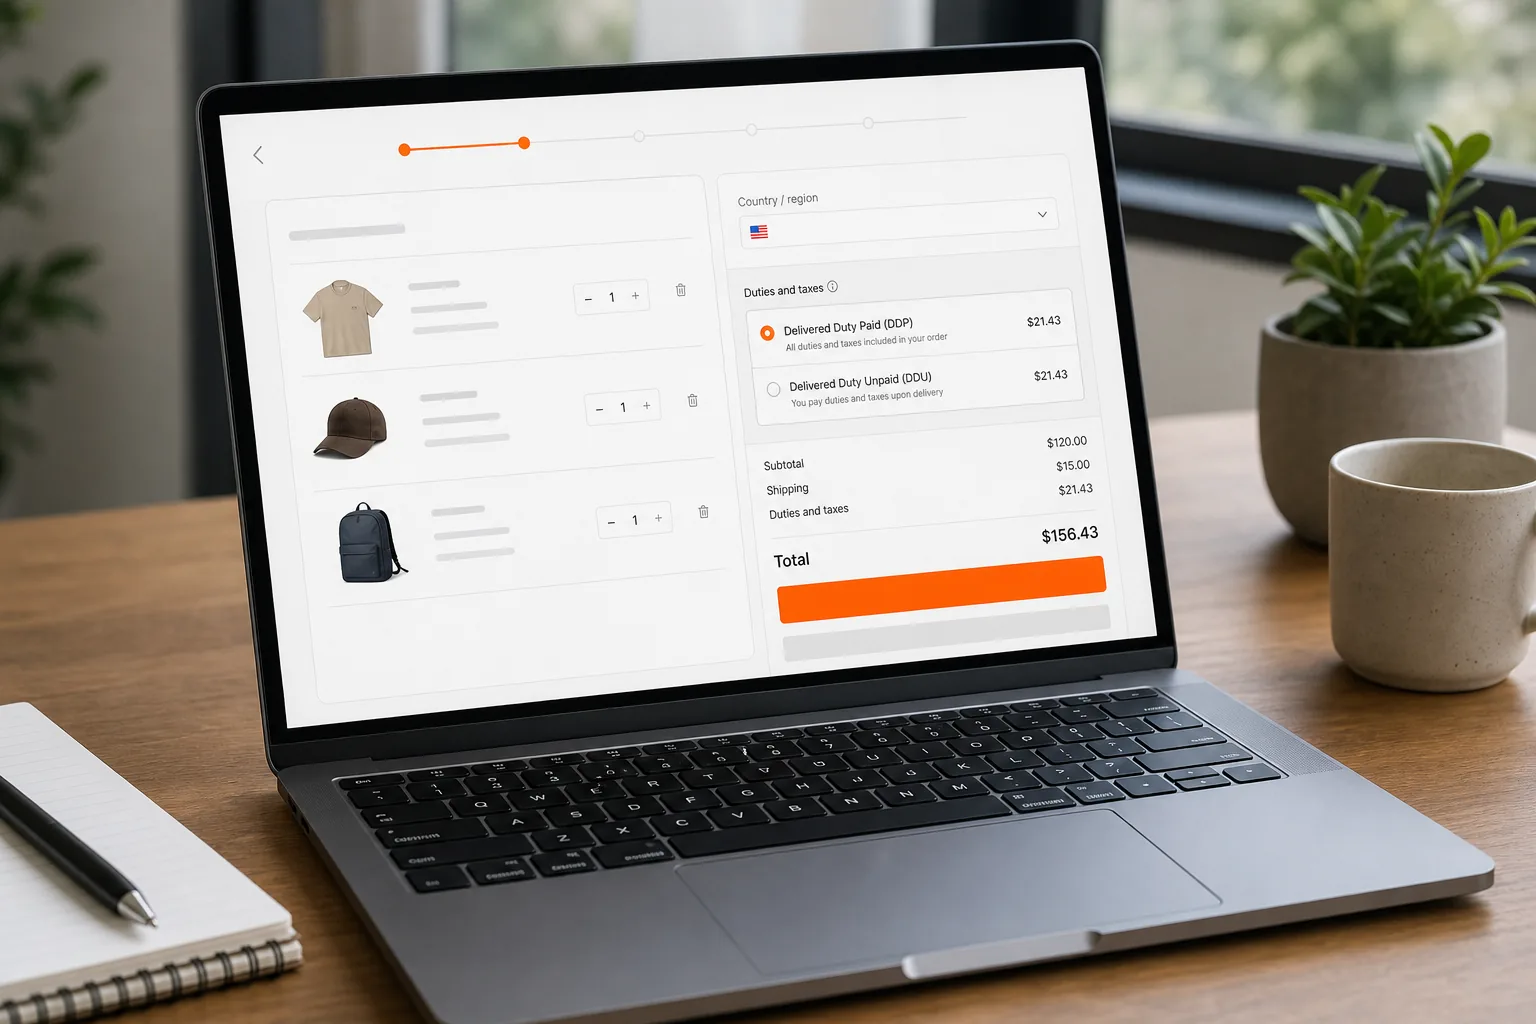
To finish the Shopify landed cost setup, decide who pays import charges. DDP means Delivered Duty Paid. You, the seller, arrange and pay the duties and import costs. DDU means Delivered Duty Unpaid. The customer may pay those charges when the shipment arrives.
DDP gives the buyer a clearer total at checkout. It can also reduce delivery surprises. But you must price the duty and tax estimate with care. If the estimate is low, your margin absorbs the gap.
DDU may keep your checkout price lower. The tradeoff is a possible customs bill for the customer. Show that message before payment. A surprise charge after purchase can lead to refused deliveries or support tickets.
Set the app's origin country first. Then select the countries where you sell. Add the duty and tax widget to the product page if customers need the estimate early. Add it to the cart page as well, usually near the subtotal, so the information stays visible before checkout.
If your theme uses a cart drawer, enable the app block in the theme editor. Save the theme after switching it on. If the product page has a fast-buy button, test that path too. A customer who skips the cart may never see the estimate.
Let shoppers change the destination country when the order may be a gift or may ship elsewhere. If that selector creates confusion, keep it off and use the checkout country instead. Test quantity changes because duties and processing estimates may recalculate when the cart changes.
When a widget fails to appear, check the app block first. Then test the cart page without the drawer. Themes use different structures, so a fallback text note can be safer than a broken estimate. Keep the wording plain: "Import duties may be collected on delivery" is clearer than a vague customs warning.
By now you should have a saved theme with the cost message visible on the product or cart path your buyers use.
Step 5: Validate Costs, Fix Display Issues, and Monitor Margins
The last step is to test the result against real documents and real checkout paths. A cost tool is only useful when its output matches the way your business pays bills.
Run a test order for each major destination. Change the quantity. Change the country. Check the cart drawer, cart page, product page, and checkout. Record what the customer sees and what your internal margin sheet expects.
Then compare the app result with your source records:
- Supplier invoice and purchase order
- Freight quote or final freight bill
- Customs entry or duty receipt
- Broker invoice
- Insurance and inland delivery records
If the result differs, find the first mismatched input. Common causes include an old exchange rate, the wrong origin country, a missing variant, or a fee allocated across the wrong quantity. Capturing those bills as they arrive makes the comparison quicker, and the guide to tracking shipping and manufacturing costs covers a workable routine.
Review margins after every major freight or duty change. A product can stay at the same selling price while its margin falls. Scenario testing helps you see the effect before the next reorder.
SupplyAutomate helps by keeping document data and cost updates in the same workflow. We can give Shopify, Amazon FBA, and WooCommerce teams a clearer view of product cost as new bills arrive. Start with one active PO, match its documents, and compare the result with your books before expanding.
Do not mix inventory landed cost with every business expense. Payment processing, ad spend, refunds, app subscriptions, and overhead belong in the full profit model. Add them after you know the cost of the unit itself.
Set a weekly review for fast-moving SKUs. Check duty changes, freight changes, supplier price changes, and margin alerts. If one SKU drops below your target, decide whether to reprice, change sourcing, or accept the lower margin before buying more stock.
Your final milestone is simple: each key SKU has an estimated cost before purchase, an actual cost after receipt, and a margin check after Shopify fees.
FAQ
What is the formula for Shopify landed cost?
Shopify landed cost equals product cost plus freight, duties, taxes, brokerage, insurance, port fees, handling, and other allocable charges. Divide that total by the number of sellable units received. For pricing, add payment processing and other order costs in a separate margin formula.
Does Shopify calculate landed cost automatically?
Shopify does not replace a full landed-cost model for every merchant. You may need an app or spreadsheet to combine supplier cost, freight, duty, and handling by SKU. A tool such as SupplyAutomate can keep those records linked to purchase orders and source documents.
How do I calculate duty for a Shopify order?
Calculate duty by multiplying the applicable customs value by the duty rate tied to the product classification and country of origin. Confirm the rate before using it in your Shopify margin model. A classification change can alter the duty result even when the supplier price stays the same.
Should I use DDP or DDU for Shopify international orders?
DDP is usually clearer for customers because the seller handles import charges before delivery. DDU can keep the checkout price lower, but the buyer may pay customs charges on arrival. Pick the model your carrier and tax process support, then show the choice and its cost before payment.
How do I show duties and taxes at Shopify checkout?
Use a compatible duty and tax app, set the origin country, select your destination markets, and add the app block to the product or cart theme. Save the theme and test several countries. If the widget fails, test the cart page and add a plain customs message as a fallback.
Should payment fees be included in landed cost?
Payment fees usually belong in your full profit model rather than inventory landed cost. Keep the two views separate: landed cost tells you what the unit cost to stock, while payment fees show what each sale costs. This split makes inventory reporting and Shopify pricing easier to review.
Conclusion
Start with a SKU-level spreadsheet, then move to SupplyAutomate when invoices, freight bills, and duty records become hard to manage by hand. Calculate one active shipment now, compare the result with your Shopify margin, and fix any missing cost before the next PO.